Upload and view the data
With the OGC Definitions Service running and the uplifted Turtle file in hand, we can now load the data into the triplestore and browse it as linked data.
About named graphs
Fuseki stores RDF data in named graphs — separate, named partitions of the triplestore, each identified by a URI. Keeping each dataset in its own named graph makes it easy to update or remove it later without affecting other data, and allows SPARQL queries to target a specific subset of the data.
We will use the graph URI https://example.com/rainbow/graphs/indicators for
this tutorial. You can choose any URI; the convention is to use one that
reflects the content.
Uploading the data
We cover three direct ways to upload the file, plus a mention of higher-level OGC tooling. Option A (the Fuseki UI) is the easiest way to get started; Options B and C are more suitable for scripting or automation.
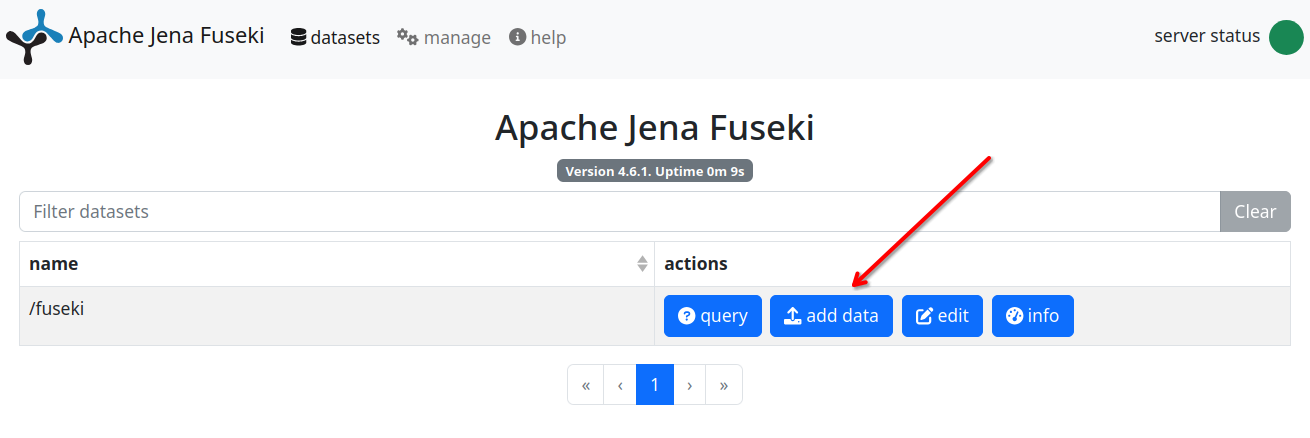
Option A: Fuseki admin interface
-
Open http://localhost:3030 and log in.
-
Select your dataset (e.g.
fuseki) from the list. -
Click add data.
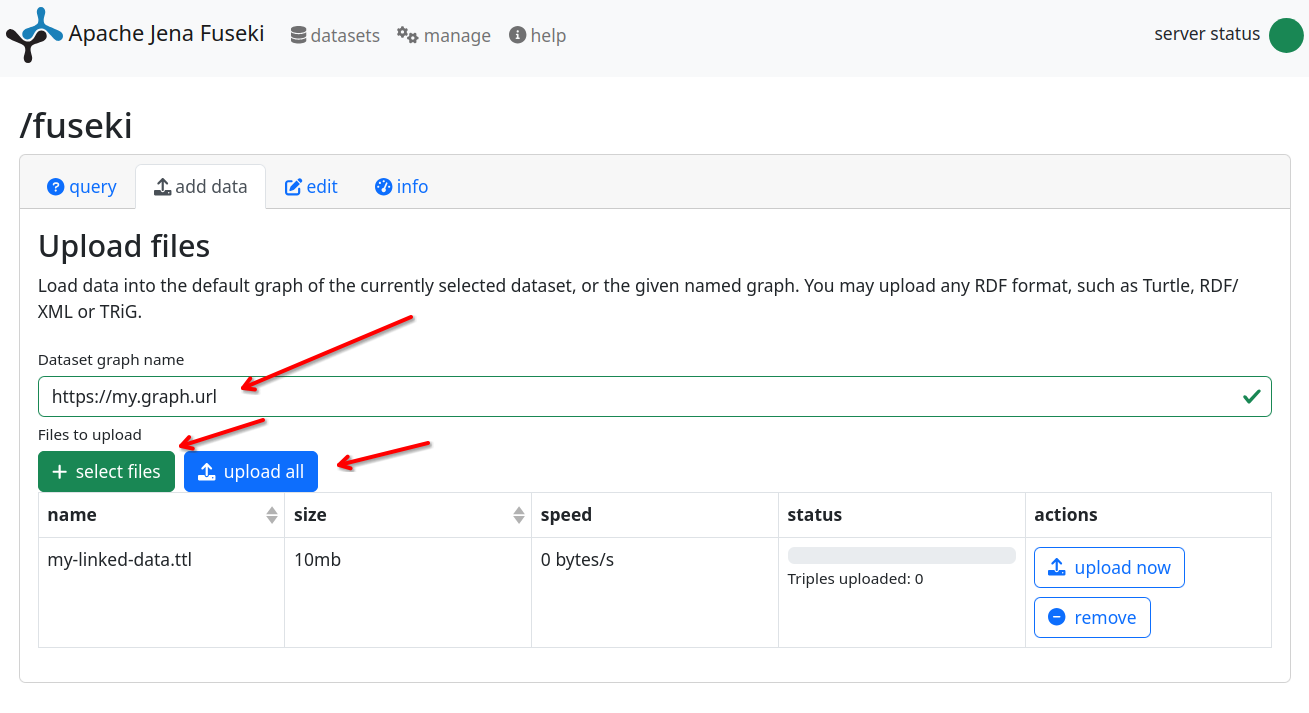
-
In the Destination graph name field, enter:
https://example.com/rainbow/graphs/indicators -
Upload
cdi-indicator.ttl. -
Click upload now.
Option B: curl
curl -X PUT \
  -u admin:${FUSEKI_PASSWORD} \
  -H "Content-Type: text/turtle" \
  --data-binary @cdi-indicator.ttl \
  "http://localhost:3030/fuseki/data?graph=https://example.com/rainbow/graphs/indicators"
Set FUSEKI_PASSWORD to the value you configured in docker-compose.yml, or
replace ${FUSEKI_PASSWORD} with the password directly.
This uses the SPARQL Graph Store Protocol
PUT method, which replaces the entire named graph with the uploaded
content. If you want to add triples to an existing graph instead of replacing
it, use POST.
Option C: Python (requests + SPARQL Graph Store Protocol)
import os
import requests

FUSEKI_URL = "http://localhost:3030"
DATASET = "fuseki"
GRAPH_URI = "https://example.com/rainbow/graphs/indicators"
FUSEKI_PASSWORD = os.environ.get("FUSEKI_PASSWORD", "changeme")

with open("cdi-indicator.ttl") as f:
    data = f.read()

response = requests.put(
    f"{FUSEKI_URL}/{DATASET}/data",
    params={"graph": GRAPH_URI},
    headers={"Content-Type": "text/turtle"},
    data=data,
    auth=("admin", FUSEKI_PASSWORD),
)
response.raise_for_status()
print(f"Uploaded successfully (HTTP {response.status_code})")
Option D: OGC Naming Authority tools
The OGC Naming Authority provides higher-level tooling that automates publishing and registration of definitions. This approach will be covered in a dedicated tutorial.
Browsing the resource
Once the data is loaded, you can browse it in the Prez UI. To understand how the URL is constructed, let's trace it from the source:
- The indicator's
idin the JSON document isindicators/cdi. - During semantic uplift,
base_uri(https://example.com/rainbow/) is prepended, giving the full resource URI:https://example.com/rainbow/indicators/cdi - The nginx-ld
REDIRECTSmapping (/rainbow/=https://example.com/rainbow/) means any request tohttp://localhost:8080/rainbow/...is treated as a request for the correspondinghttps://example.com/rainbow/...URI. So the resource is locally accessible at:http://localhost:8080/rainbow/indicators/cdi
If you are testing locally and did not replace the https://my.own.domain/
references in docker-compose.yml with http://localhost:8080/, navigating
to the resource URL or following a linked data redirect will send your browser
to https://my.own.domain/[...] instead of your local instance. Make sure
the SYSTEM_URI, PREZ_UI_URL, and EXTERNAL_PREZ_BACKEND_URL environment
variables are all set to http://localhost:8080/ before proceeding.
Navigate to that URL to see the Prez UI rendering of the resource.
Retrieving the linked data representation
You can also retrieve the RDF representation directly using curl. The -L
flag is necessary because nginx-ld implements the linked data pattern: it
inspects the Accept header and responds with an HTTP 303 redirect to the
appropriate Prez endpoint. Without -L, curl would stop at the redirect and
return nothing useful.
curl -L \
  -H "Accept: text/turtle" \
  "http://localhost:8080/rainbow/indicators/cdi"
Prez will return the resource serialized as Turtle RDF.
Registering in the Prez catalog
Browsing a resource by its URI works as soon as the data is in the triplestore.
However, Prez also provides a data catalog view — a browsable hierarchy of
all published resources. For a resource to appear there, it must be declared as
an entry in a dcat:Catalog → skos:ConceptScheme → skos:Concept hierarchy
that Prez recognizes.
We will use the Prez default hierarchy OGC Block
(ogc.prez.hierarchy.default) to define this scaffolding. Like the provenance
block, it ships with a schema and a JSON-LD context, so you can use it straight
away or inspect its definition to understand exactly what RDF it produces.
Creating the catalog document
Create a file called cdi-catalog.json. Each resource from the provenance chain
becomes a skos:Concept entry, a skos:ConceptScheme groups them, and a
dcat:Catalog wraps everything.
{
  "id": "catalogs/rainbow",
  "name": "Rainbow Catalog",
  "items": [
    {
      "id": "schemes/drought-indicators",
      "name": "Drought Indicators",
      "concepts": [
        {
          "id": "indicators/cdi",
          "name": "Composite Drought Indicator"
        },
        {
          "id": "act/cdi-computation",
          "name": "CDI Computation"
        },
        {
          "id": "obs/soil-moisture-anomaly",
          "name": "Soil Moisture Anomaly"
        },
        {
          "id": "obs/rainfall-anomaly",
          "name": "Rainfall Anomaly"
        },
        {
          "id": "obs/vegetation-condition-anomaly",
          "name": "Vegetation Condition Anomaly"
        }
      ]
    }
  ]
}
The id values for the concepts are the same ones used in cdi-indicator.json.
After uplift, both documents produce triples for the same URIs, so the concept
entries point at the resources already in the triplestore rather than creating
new, duplicate ones.
Uplifting and uploading
The process follows the same validate → uplift → upload pattern, with two
differences: the Prez Blocks register is used instead of the provenance one,
and the data goes into a dedicated catalog graph. Here we also skip writing
an intermediate Turtle file and pass the serialized RDF directly to the upload
request. Keeping the catalog in a separate graph is important because PUT
replaces the entire named graph on each upload; if the catalog and the
provenance data shared a graph, updating one would overwrite the other.
from ogc.bblocks.register import load_register
from ogc.bblocks.validate import validate_json
from ogc.bblocks.semantic_uplift import uplift_json
import json, requests, os

# Load the Prez Hierarchy block
register = load_register(
    "https://ogcincubator.github.io/bblocks-prez/build/register.json"
)
bblock = register.get_item_full("ogc.prez.hierarchy.default")

with open("cdi-catalog.json") as f:
    catalog = json.load(f)

result = validate_json(bblock, catalog)
result.raise_for_invalid()
print("Validation passed!")

rdf_graph = uplift_json(bblock, catalog, base_uri='https://example.com/rainbow/')
data = rdf_graph.serialize()
print("Uplift complete")

FUSEKI_URL = "http://localhost:3030"
DATASET = "fuseki"
GRAPH_URI = "https://example.com/rainbow/graphs/catalog"
FUSEKI_PASSWORD = os.environ.get("FUSEKI_PASSWORD", "changeme")

response = requests.put(
    f"{FUSEKI_URL}/{DATASET}/data",
    params={"graph": GRAPH_URI},
    headers={"Content-Type": "text/turtle"},
    data=data,
    auth=("admin", FUSEKI_PASSWORD),
)
response.raise_for_status()
print(f"Catalog uploaded (HTTP {response.status_code})")
Once uploaded, the Composite Drought Indicator and its associated resources will
appear under Rainbow Catalog in the Prez catalog view at
http://localhost:8080.
Summary
You have successfully:
- Deployed the OGC Definitions Service locally
- Described the Composite Drought Indicator as a provenance chain
- Validated and uplifted the document with
bblocks-client-python - Uploaded the data to Fuseki and browsed it as linked data
- Defined the Prez catalog scaffolding and made the resources discoverable in the catalog view
The indicator is now published and accessible as a dereferenceable linked data resource, and discoverable through the Prez data catalog.
Moving to real-world URIs
Throughout this tutorial we have used https://example.com/rainbow/ as a
placeholder URI namespace. For a real deployment, you would replace this with
a namespace you actually control, so that the URIs you publish are stable and
dereferenceable on the public web.
There are two common approaches:
-
Use a domain you control. If your organization owns a domain, you can dedicate a path on it to your definitions (e.g.
https://yourdomain.example.org/rainbow/). You configure your OGC Definitions Service at that address and set the nginx-ldREDIRECTSaccordingly. The URIs you mint will then resolve directly to your service. -
Use a persistent URI redirection service. Services such as w3id.org provide stable, community-governed URI namespaces that redirect to a URL of your choice. This is useful when you do not control a suitable domain, or when you want the URIs to remain stable even if the underlying service moves. You register a namespace (e.g.
https://w3id.org/your-namespace/rainbow/), configure it to redirect to your deployment, and use that namespace as thebase_uriin the uplift step.
In both cases, the only things that change are the base_uri passed to
uplift_json and the corresponding entries in docker-compose.yml. The
structure of the data and the rest of this tutorial remain exactly the same.